Goodness gracious! I made this meal for a event, and it disappeared in minutes
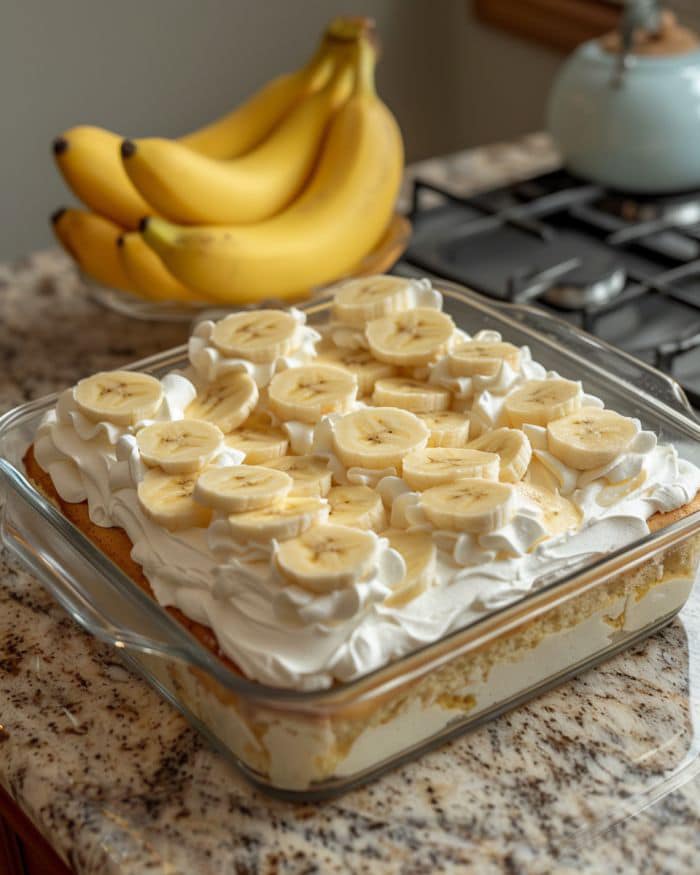
Bananas provide a creamy richness to our no-bake banana dream cake, which also has crispy cookies and delectable whipped cream. When the weather gets warmer, no-bake dishes like this one are a lifesaver. Whether you’re hosting a party or just want a special dessert for a weeknight, this cake will be a hit. When ovens were a luxury few could afford, no-bake cakes were a genius way to make sweets without the oven. Their origins may be found in those simpler times.
To cut through the richness of this sumptuous cake, try it with a strong cup of coffee or a delicate herbal tea. It would be a delightful addition to a dessert spread with some fresh fruit or gelato for a burst of coolness.
Three big, ripe bananas, peeled and sliced
twelve ounces of vanilla wafers—one packet
1 container of thawed whipped topping (8 oz.)
one 3.4-ounce container pudding mix, vanilla, instant
(1) cup of chilled milk
powdered sugar— half a cup and one teaspoon of vanilla essence
Some more banana slices and crumbled vanilla wafers for topping it off
What to do
1. Combine the chilled milk and instant vanilla pudding mix in a large bowl and whisk until smooth. To thicken, set aside for 5 minutes.
Second, whisk in the vanilla extract with the pudding.
3. In a another dish, mix the powdered sugar and whipped topping until well combined.
4. In a big dish, stack the bottom with vanilla wafers to begin building the cake. For a sturdy foundation, overlap slightly.
5. Arrange sliced bananas on top of the wafers.
Sixth, top the bananas with half of the vanilla pudding.
7. Layer the bananas, then add another layer of vanilla wafers, and finally, top with the remaining pudding.
Put the whipped topping on top and smooth it out evenly.
9. Add extra sliced bananas and smashed vanilla wafers as garnish.
10. Allow the flavors to combine and the wafers to soften into a cake-like consistency by chilling in the refrigerator for at least three hours, preferably overnight.
For Complete Cooking STEPS Please Head On Over To Next Page Or Open button (>) and don’t forget to SHARE with your Facebook friends
Continued on the next page
ADVERTISEMENT
ADVERTISEMENT
